

Two Brilliancies — and a Bonus
The full mating lines from the John Emms profile, checked move by move with Stockfish 16.
Companion to “The Grandmaster Next Door”
Puzzle One
Emms – Arkell, British Chess Championship, 1999. White to play.
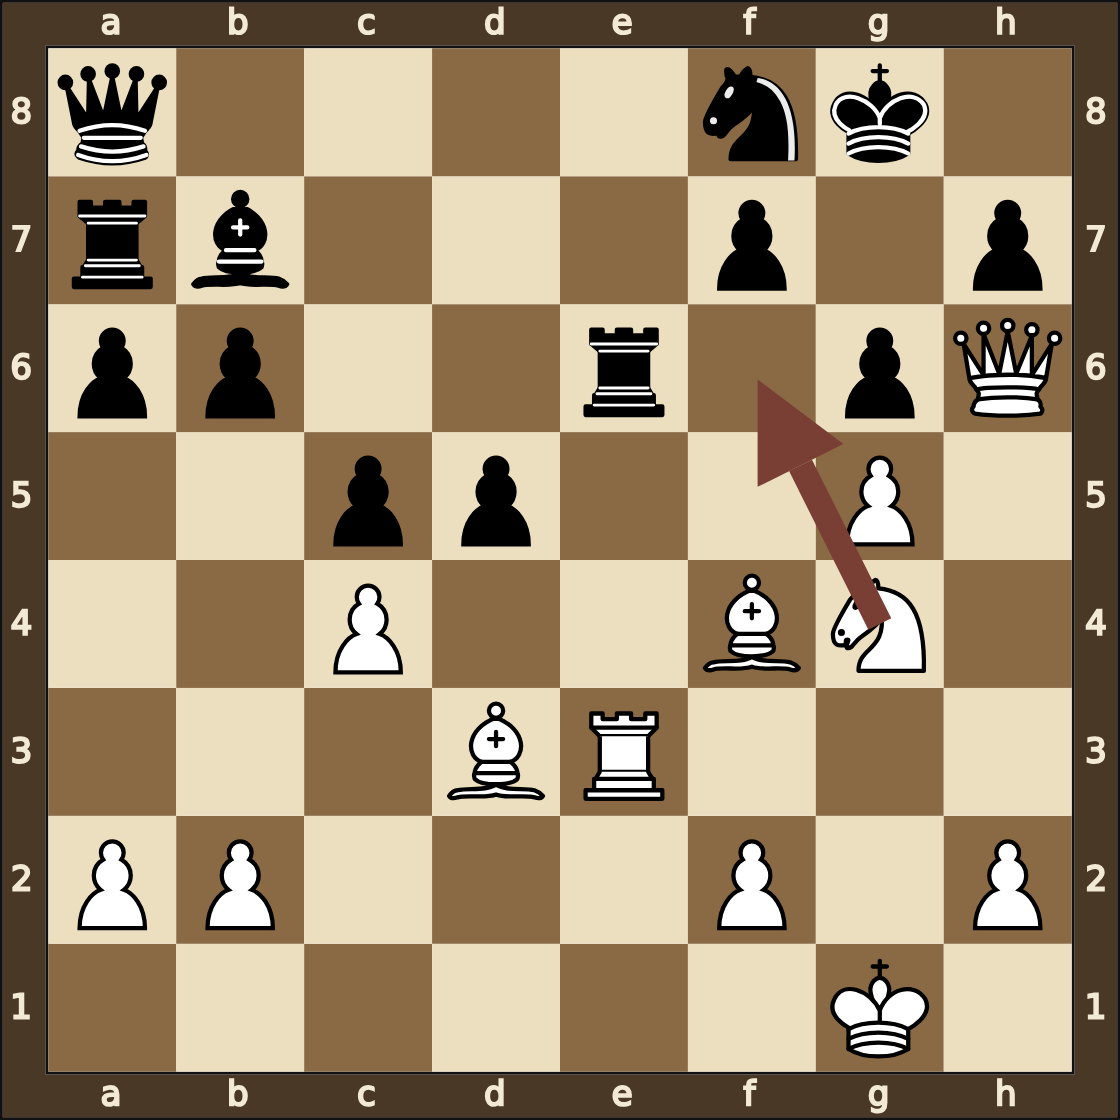 Before 24.Nf6+ Before 24.Nf6+ | 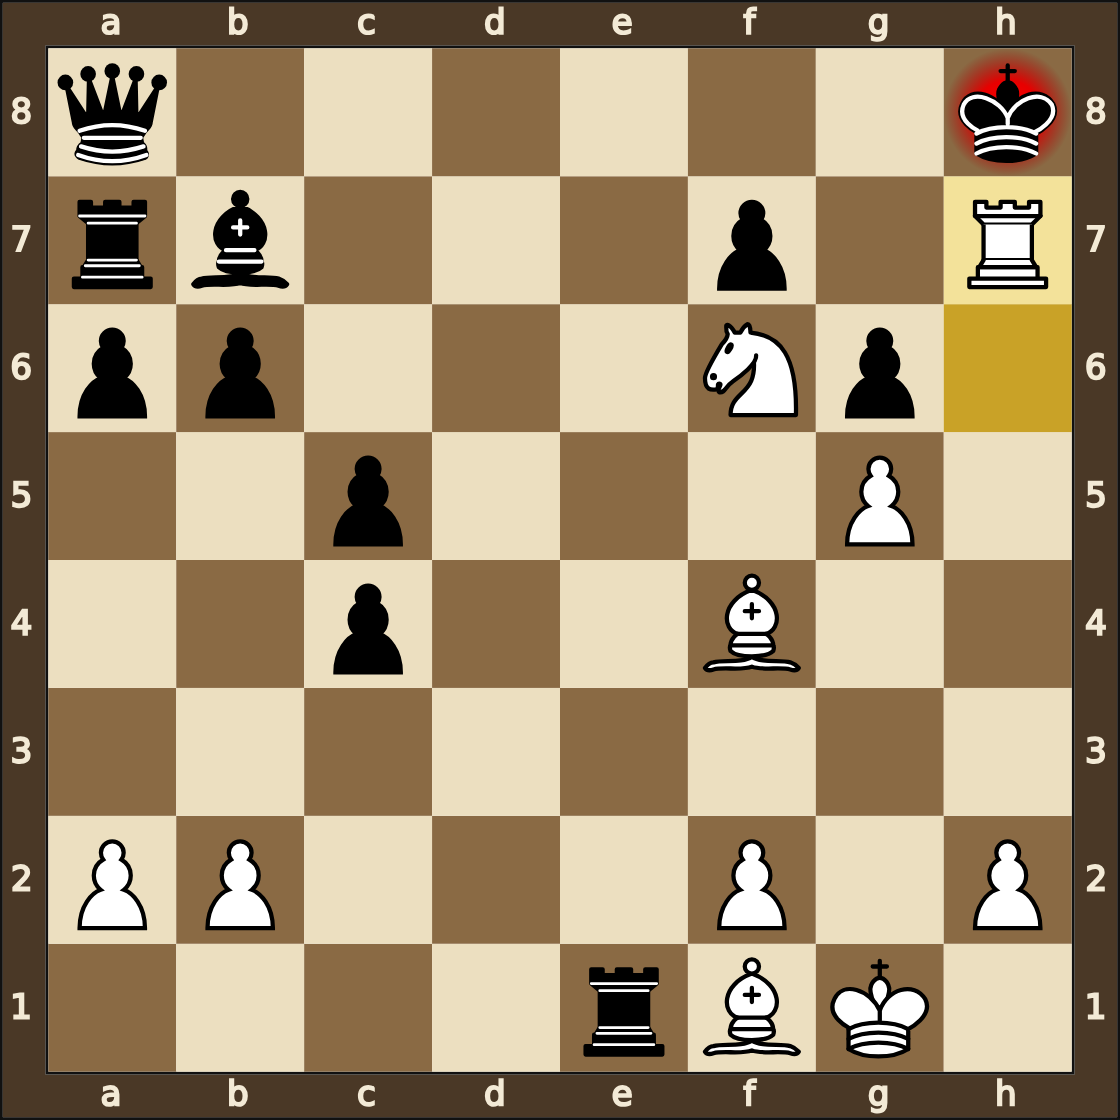 After 28.Rxh7# After 28.Rxh7# |
- 24.Nf6+!! — It looks like a simple trade, but the real idea is to clear the knight off the board entirely — it was the only piece watching g7 and h7, and once it’s gone those squares are wide open for White’s queen and rook to move in on.
- 24…Kh8 (forced choice) — The alternative, 24…Rxf6, gives back the knight but leaves exactly the same holes behind — there’s no way to patch up the king’s shelter either way.
- 25.Rh3 — The rook swings across to the h-file — the file the whole combination has been aimed at since the first move.
- 25…Re1+ — Arkell’s last try — a check, to buy a tempo and look for counterplay.
- 26.Bf1 — A calm block. White doesn’t need to rush; nothing on the board can stop the rook’s arrival on h7.
- 26…dxc4 (no defence left) — Arkell picks up a pawn on the way down rather than resign a move early.
- 27.Qxh7+! — The point of it all. The queen sacrifices itself on the exact square the attack has been building toward — Black has to take with the knight, since nothing else can reach h7.
- 27…Nxh7 (only legal move)
- 28.Rxh7# — Checkmate. The rook that switched to the h-file three moves earlier finishes the job on the exact square it was always heading for.
Checked with Stockfish 16: Black has no improvement anywhere in this line.
Puzzle Two
Emms – Holzke, Bundesliga, 2004/05. White to play.
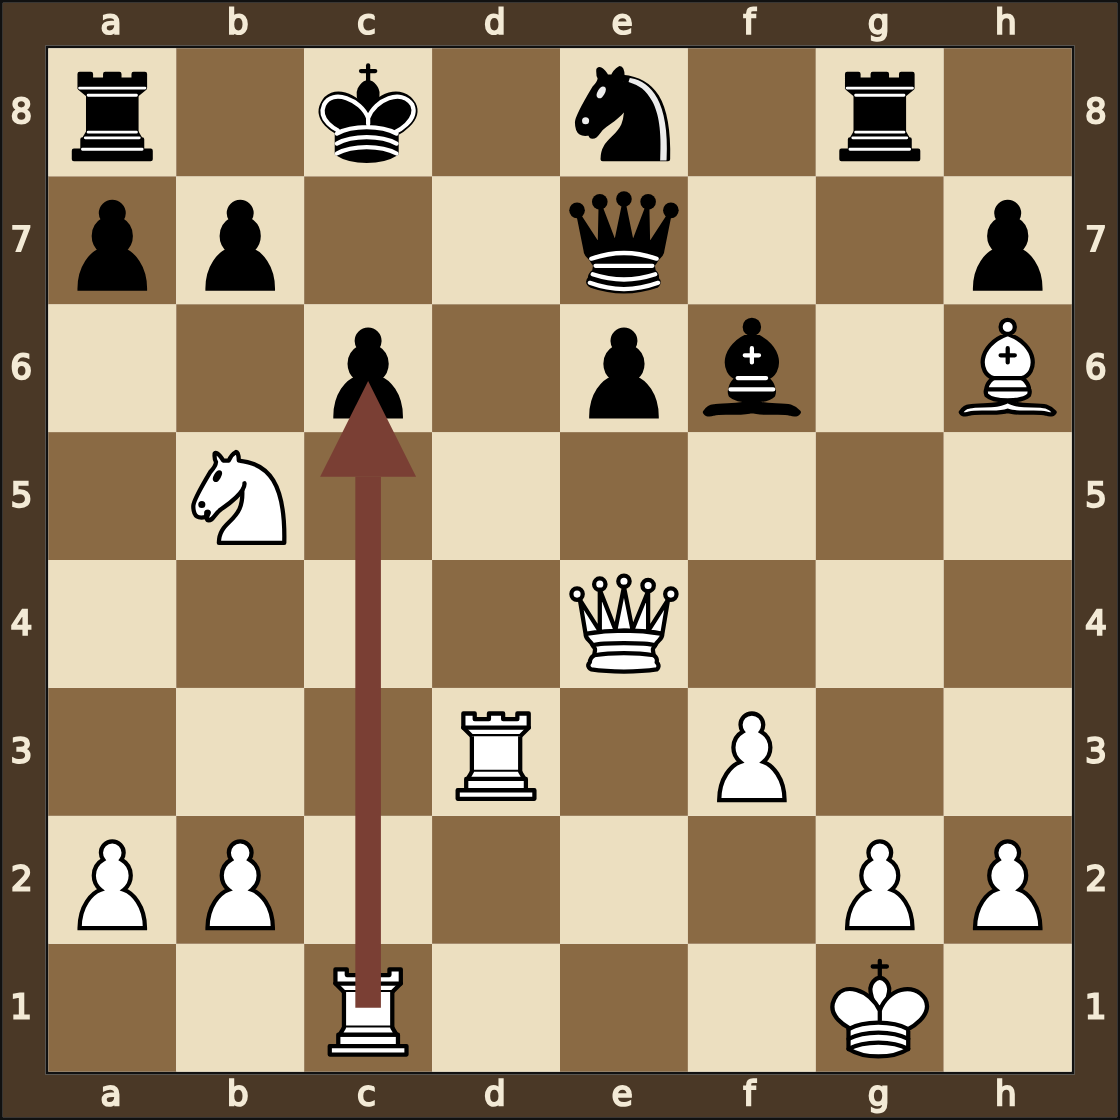 Before 24.Rxc6+ Before 24.Rxc6+ | 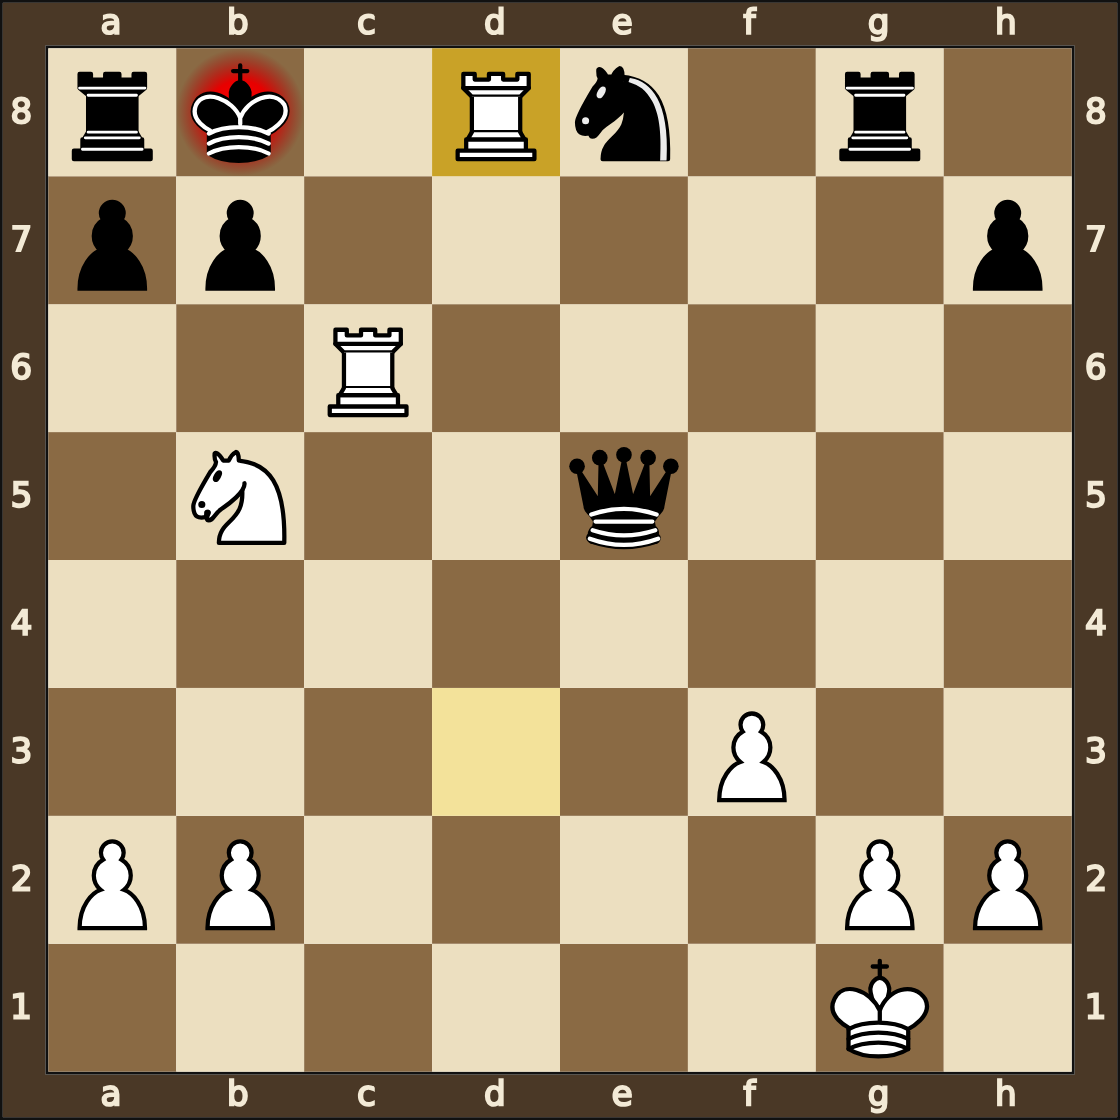 After 28.Rd8# After 28.Rd8# |
This one isn’t a single forced-move corridor like Puzzle One — it’s a real decision tree. At two separate points Black has several different tries, and the solver has to know that all of them lose before committing to the sacrifice.
- 24.Rxc6+!! — The whole point of the puzzle. White offers up a rook for nothing more than a pawn and a check, to drag Black’s king out where the bishop on h6 and queen on e4 can get at it — and Black actually has a real choice here, not a forced recapture.
- 24…Kb8 (the losing choice) — Played in the game. Black declines the rook and walks the king to safety — straight into a mating net. The tougher try was 24…bxc6, simply taking the rook: Black stays down a full piece and is completely lost, but at least survives past move 28. Either way White is winning easily; only one way gets mated on the board.
- 25.Bf4+ — The bishop joins the attack down the long diagonal. With the king boxed in on b8 and no piece able to cover every square at once, Black is out of good options — whichever way the check is met, the king’s shelter keeps falling apart.
- 25…e5 (one losing try among several) — Played in the game, blocking the check with a pawn.
- 26.Bxe5+ — Removing the blocker, with check again — the bishop simply keeps coming.
- 26…Bxe5 (forced recapture)
- 27.Qxe5+! — The point of the whole combination: White is happy to trade queens here, because what’s left afterwards is mate, not just a winning ending.
- 27…Qxe5 (pathetically forced) — Black’s queen has to interpose — not because it wants to trade, but because it’s the only piece that can get in the way of the check at all. It changes nothing.
- 28.Rd8# — Checkmate. The rook that had been quietly repositioned on d3 three moves earlier delivers the final blow — clearing this exact route to d8 was the idea behind 24.Rxc6+ all along.
Checked with Stockfish 16: from 25.Bf4+ onward, nothing Black tries changes the result. The only way to survive longer than the game did was to decline the rook on move 24 with 24…bxc6 — which stays completely lost, just not mated outright.
Bonus: the Anand game (Oakham, 1986)
The full game opened our profile of John Emms. It isn’t a mating puzzle — it’s a lesson in technique, played by a 19-year-old against a 16-year-old who would become World Champion five times over.
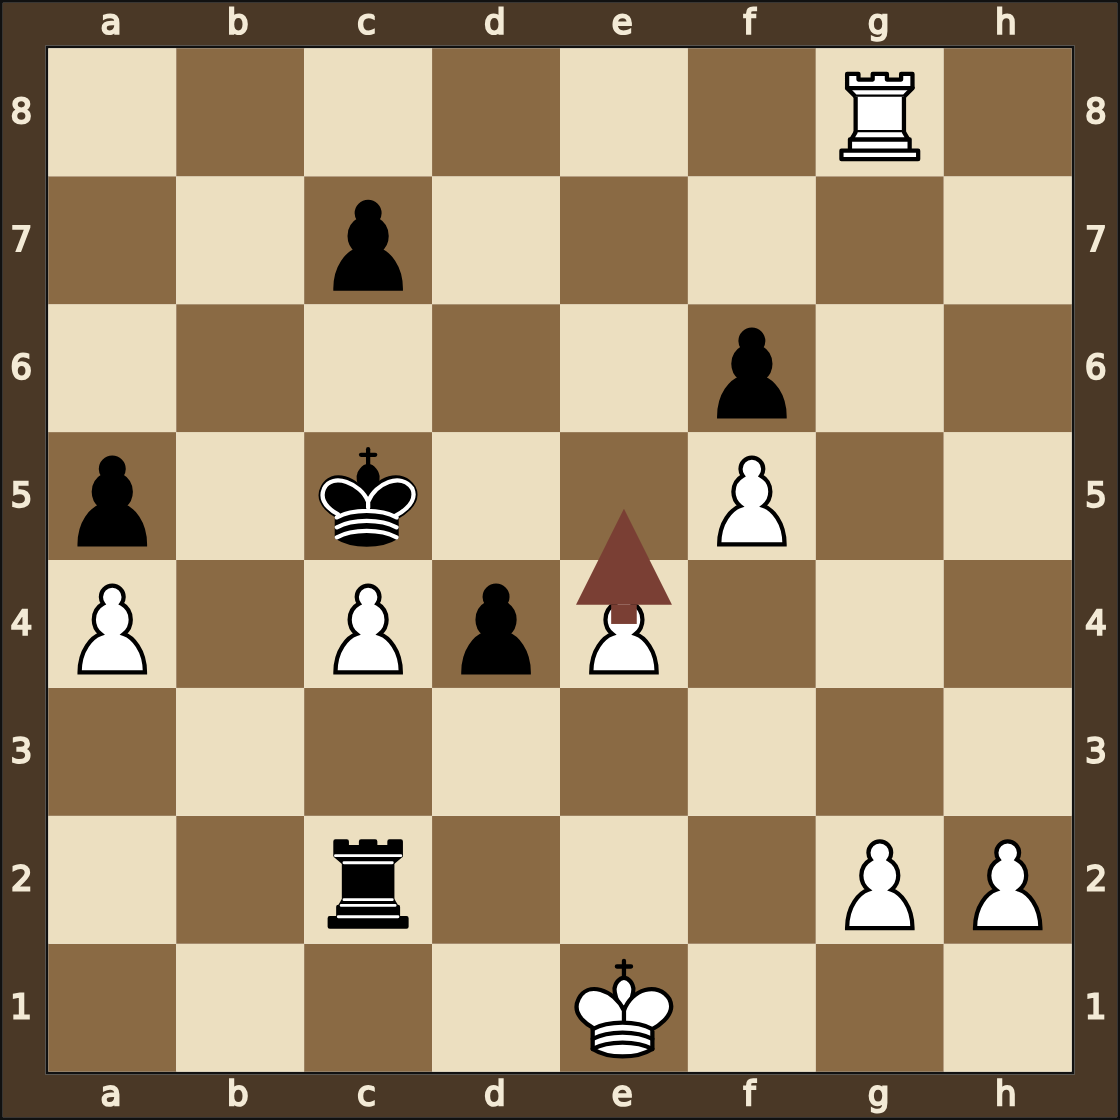
Before 40.e5
By move 40, Emms is up two pawns in a rook endgame, but Black’s rook is active and there’s no obvious way to make progress — the kind of position that looks like a long defensive grind ahead for Black rather than a lost cause. Then:
- 40.e5! — A move that looks like it throws away a pawn for nothing. In fact it’s the whole point: after the trade on e5, White’s f-pawn becomes an unstoppable runner, and Black’s rook — for all its activity — can never quite get back in time to stop it or organise perpetual checks. What looked like a long defensive task for Black turns, in one move, into a lost cause.
- 40…fxe5 41.f6! — The point. The pawn cannot be caught.
- 41…Rc1+ 42.Kf2 Rc2+ 43.Kg3 Rc3+ 44.Kg4 d3 45.f7 Rxc4+ 46.Kg3 Rf4 47.f8=Q+ — Black’s checks run out one square from safety. New queen, and Black resigns.
Source: Oakham Young Masters, April 1986, via a personal ChessBase export of John Emms’s tournament games. Ratings and round data as recorded in the database.
← Back to the John Emms profile
All lines on this page were checked with the Stockfish 16 engine before publication, not just eyeballed from the game score.